Sunday, 29 July 2012

Have your cake and eat it!


I can't claim that this chocolate cake is a health food, but it is a special cake indeed. All too often, cakes that are trumpeted as being low in fat, are sadly also lacking in taste. But not this one! This chocolate cake is fudgey and very chocolatey, yet it manages to be lower in fat than a usual chocolate cake. 

A small slice of this cake comes in at 10.4g fat compared to a standard 49g bar of Dairy Milk which weighs in at 14g of fat. Now don't sneer at a small slice - as this cake has a fudge-like depth, you wouldn't want a big slab of it. Every little helps... 

Want to know the secret to this tasty, slightly healthier chocolate cake? 

Butternut squash - I kid you not! 

Wanna test it out? Get in touch and order it!  


Monday, 16 July 2012

Cookie Love - Update


A while ago,  I posted about a cookie cutter set I bought in New York and this weekend I managed to play about with some ideas using the cutters. I wanted to use a reliable cookie recipe that would produce a dough that can be rolled out easily and is not too sweet. I'm happy with the results, but still feel there's room to play around with different cookie recipes to suit the mood - sometimes I like a light, crisp cookie, other times I'd like a more 'short' sort of biscuit, like shortbread.

These cookies are very adaptable as I can change the messages to suit the occasion - for my practice cookies, I used the star cutter and the message 'You're a star', the heart cutter with 'I love you' and the scalloped edge rectangle cutter with 'Becky Bakeswell' and 'Keep calm carry on.' However, the messages can be changed easily, so I thought they would come in handy as wedding favours with the names of the couple stamped into them, birthday cookies or maybe baby shower cookies.


Looking forward to using them again!


Thursday, 5 July 2012

Banana Breakfast Ring


A quick little post about a naughty breakfast treat! Sunday mornings are sometimes spent making banana pancakes, but last Sunday, I didn't have quite enough milk to make up the batter, so used this as an opportunity to make this cake from Nigella Lawson's book Feast. I had been meaning to make it for a couple of years, but felt guilty at the idea of eating cake for breakfast - illogical I know considering I don't mind eating pancakes, but I delude myself into thinking they're ok if I eat them with fruit!


This cake is lovely while it's still warm from the oven, with a cup of tea and it's easy to make. It's also useful because it's actually better when it's made with bananas that are past their best and the ingredients are also ones you will likely have lurking in your kitchen - perfect for a Sunday morning when the last thing you want to do is traipse to the supermarket for ingredients!

Ingredients

450g (3 medium) ripe bananas
60ml corn oil or other oil
3 eggs
Zest and juice of a lemon
1 tsp vanilla extract
200g caster sugar
1 tsp baking powder
1/2 tsp bicarbonate of soda
325g plain flour

Preheat the oven to 180 degrees centigrade/ 350 Farenheit/ Gas Mark 4.

1) Grease a 24cm/1.5 litre ring mould ( I tend to use spray oil as I find it gets into the decorative crenelations of the ring mould more easily).

2) Mash the bananas in a roomy mixing bowl, add the oil, eggs, lemon zest and juice, vanilla and sugar.

3) Whisk everything together and then fold in the flour, baking powder and bicarbonate of soda.

4) Pour the cake batter into the oiled ring mould and bake for approx 40 mins. I have a fan assisted oven and found that my cake was done in 35 mins, so check at 30 mins to be on the safe side.

5) Let the cake sit for about 5-10 mins before turning out.

6) Make a cup of tea or coffee, release the cake from its mould and cut a generous slice. Sit back and enjoy your weekend!


Hints and Tips

  • I love ground almonds so I replaced 25g of the flour with 25g ground almonds. It gives the cake a lovely subtle almond flavour and a soft, slightly damp texture perfect for a plain cake. 
  • If you don't have a cake ring and you want to make this without one, you could try making it in a loaf tin, as long as it's roughly the same capacity - 1.5 litres (I think this is a 2Ib loaf tin if you work in imperial measures). You will need to keep a closer eye on cooking times though - might take slightly longer as the mix will be in a deeper tin.


Wednesday, 27 June 2012

Ice Cream Dreams...


Dan bought an ice cream maker for us about a month ago and since then, we have been like two crazy ice cream Doc Browns in our kitchen, trying to create the DeLorean of ice creams that takes us back to our childhood. We have made raspberry ripple, banana choc chip (yummy) and a special for my Dad as a Father's Day treat - rum and raisin.

I bought the Ben and Jerry's ice cream recipe book and would definitely recommend it as a bible for ice cream crazies like us!

Last weekend, we made Jerry's ice cream base from the book and decided to experiment with the idea of making a Black Forest Gateau ice cream.

Making Jerry's chocolate ice cream base mixture.


 We both have fond childhood memories of the cake and wanted to see if it would work as an ice cream. We chopped up pieces of choc chip muffin, black cherries and doused them with a generous glug of cherry brandy.


. A few chocolate chunks whirled into the mix too and this is the result...Dreamy!


Monday, 11 June 2012

Introducing... Sparkle and Pop Cupcakes!


These little beauties are still in the development phase, but I wanted to share them with you! I have called these engagement cupcakes 'Sparkle and Pop' cupcakes as they refer to the sparkle of the engagement ring and the pop of the fizz cork - yep these cakes contain the lovely bubbly stuff! Still experimenting with the method of making the edible icing ring and different ways of transferring a champagne flavour, but I'm very happy with the moist texture of the cake due to the drizzle syrup I came up with.


Sunday, 10 June 2012

Five Dollar Shake...


For as long as I can remember, I have been in love with diner shakes. Before I had the glory of drinking a diner shake, I was actually in love with the idea of a diner shake. At a formative age, I watched Pulp Fiction and wanted to visit the fictional diner in the film, Jack Rabbit Slim's. I wanted to sit in a hollowed out car-booth and order a five dollar shake, like Uma Thurman...


When Dan and I went to New York at Christmas, we went to The Brooklyn Diner and the first thing I ordered was... a diner shake! I loved that I was handed the canister to top up my shake - it's a generous act.


So, when Dan suggested buying a milkshake maker this weekend, I was pretty excited! Having researched milkshake makers for a while, we found that the general advice is to find an original commercial mixer as they are so sturdy that they make the smoothest and frothiest shakes. 

We then found a vintage milkshake maker listed on ebay at a reasonable price and found it was being sold locally. To cut a long story short, we bought it and found out that it had belonged to the seller's parents who owned a coffee house in Manchester. It was part of the equipment left in the cafe when they had bought the business in 1960, so it was second hand then. I love that our milkshake maker has a history and a lovely one at that - it served the lovely people of Manchester for many years, brightening up their day in a frothy way. 

The milkshake maker is a Gaskell and Chambers Dalex mixer. It is sturdy, beautifully designed and makes the best Goddamn milkshake I've ever tasted! It now sits proudly on our dresser, as it did on the counter-top in the cafe all those years ago... 


Saturday, 9 June 2012

Edible Engagement Rings


This little bobby dazzler is one of my works in progress - I'd like to make engagement cupcakes and thought that the only thing I'd like to adorn my swirl of icing is a sparkling edible ring. They are divas to make though - particularly when trying to attach the edible diamond to the band itself without the sugar paste crumbling. Cupcakes to be made this afternoon, so pop back to my blog for an update later today...

Monday, 21 May 2012

Hot and Saucy Chocolate Pudding


The first thing I should say about this cake is that it's easy to make. It is also verrrrry chocolatey! However, it's not a dainty or pretty cake. It's the sort of cake that's like the favourite jumper that you have hiding in the wardrobe that's a bit worn and bobbly in places but is coseeeeey. This cake is like that - it's basically a hug in cake form.

I'm not usually bossy about the way that you should serve cakes, but this cake really does require pouring cream or ice cream to sit alongside it - this cake is a thick chocolate sauce gloop-fest and it really needs something to help it along - mint ice cream is yummy with it, or you could do as I did and serve it with decent vanilla ice cream and some strawberries...

For the cake:
150g self-raising flour
25g good quality cocoa (I use Green and Black's)
200g caster sugar ( a lot I know, but it serves 6)
50g ground hazelnuts or almonds - choice is yours
75g dark chocolate buttons or good quality chocolate roughly chopped
180ml full cream milk
1 tsp vanilla extract
40g butter, melted
1 free range egg.

For the sauce:

180g dark muscavado sugar
120g good quality cocoa
500ml boiling water

Pre-heat oven to 180 C/ 350 F/ Gas Mark 4.

1) Put all the dry ingredients for the cake together in a mixing bowl (flour, sugar, cocoa, ground nuts, chocolate pieces). Mix them together.


2) In a jug or separate bowl, whisk the milk, vanilla extract, melted butter and egg.

3) Pour the wet ingredients into the dry ingredients and mix thoroughly.


4) Pour the cake batter into a buttered souffle dish or deep sided oven-proof dish (about 20cm in diameter).

5) Mix the muscavado sugar and cocoa together, then sprinkle on top of the pudding.


6) Pour the boiling water on top of the sugar and cocoa coated cake. Resist the temptation to stir the water into the lumps of cocoa and sugar. It really will be fine - I know this is scary, but trust me, it works!


7) Transfer swiftly and carefully to the oven and bake for 35-40 mins. When checking the cake, the watery cocoa and sugar mix should have disappeared into the cake and the top of the cake should be firm and springy. Don't be alarmed by the cratery nature of the cake - that's the sort of cake this is.  A knife or skewer inserted into the cake should come out fairly clean, with no batter clinging to it.

Like I said, this is a thick woollen jumper of a cake, as opposed to a fine cashmere knit.
Whilst  it's not pretty, it tastes gooooood! 


8) Serve at once with chilled pouring cream or ice cream. Berries such as strawberries, raspberries or blackberries can also come to the cake party if you like!


Monday, 14 May 2012

The Artful Dodger


A few weeks ago, I bought a beautiful pottery rolling pin from an antique shop in Holmfirth. It gave me the excuse I needed to get some jammie dodgers and cookies made: pronto! It also gave me the excuse to buy this book from Amazon: http://www.amazon.co.uk/Pie-Angela-Boggiano/dp/1845334892/ref=sr_1_1?ie=UTF8&qid=1337029414&sr=8-1 which makes me go mmmmmmm with every page turn!

So, back to the biscuits! I decided I wanted to make heart shaped jammie dodgers and so checked out a recipe via Cherry Menlove's blog. Cherry Menlove is Britain's swishy haired answer to Martha Stewart - a bit like Marmite as she does divide opinion but I tend to think that her blog can be viewed as tongue-in-cheek, rather than in earnest. I also reckon you'll see her on TV soon, so remember her cool name if you haven't heard of her before.


The rolled out dough is stamped into heart shapes.


The hearts are paired off on to a greased baking tray and the
interior heart is stamped out.

Once the biscuits have been cooked and cooled they can be sandwiched together with good quality jam to make yummy jammie dodgers! I tend to use Wilkins and Sons jams as I think they are the tastiest jams and have the best range of flavours. We tend to have strawberry and raspberry as there is debate over which is the better fruit in our house.


If I'm honest, I think Cherry's biscuit dough is a bit too buttery and soft - I do prefer a more crunchy sort of biscuit, but with a tweak and here and there, it would be perfect. I added some vanilla bean paste to my dough which I loved and would do again.

I also made a batch of gooey chocolatey chip cookies using the recipe from the cookery book of my childhood...


I just replaced the milk chocolate chips in the recipe with the same amount of roughly chopped Green and Black's Dark 70% chocolate - why go to the trouble of making your own cookies to fall at the last fence by scrimping on the chocolate?

They came out of the oven looking and tasting pretty damn fine!


Friday, 11 May 2012

Cake Love

Recently, people have asked me if I will be buying or making my own wedding cake. In my dreams, where money is no object, I'm catching a train to London to make the pilgrimage to Peggy Porschen's pink parlour in Belgravia to beg her to make me a cake like this...


Then I wake up!

There is no way that we can afford a Peggy Porschen cake and I should say right away that there's no way I can make sugar roses as beautiful and realistic as this, but I do like the idea of baking our wedding cake. It seems natural for me to consider it as baking and cakes consume most of my thoughts and I would want a lot of input into the design of the cake anyway. I will need to practise and experiment until I have the sort of quality and finish that I would be happy with but this also is a good thing for Becky BakesWell anyway.

People who know me, also know of my love for polka dots and anything Cath Kidston related, so these cake ticks boxes for me!


However, as our wedding is at Christmas this sort of design could be lovely - especially as it means I get to make royal icing snowflakes, which I love to do.


I do love Peggy Porschen cakes though and her Paris themed cake would also fit in nicely if we did decide to go ahead with plans to stay in Paris for our honeymoon...


Just as I think I have pinned down what I like though, I start to consider cupcakes and a small cake as a top tier!

 Feel free to share the cake love by posting any ideas or photos of cakes for inspiration that you think are pretty and unusual. 

Becky Bakeswell x


Wednesday, 25 April 2012

Special Milestone

I'm rather excited about this mini post - it's just a quick note to say thanks to all of you who read my blog, as you have helped me to reach a small but important milestone in the Becky BakesWell journey. Today this little blog reached its 1000 view marker!

The closing date for the business start-up competition I am entering Becky BakesWell into is nearing and it's making me consider in more detail what I would like Becky BakesWell to become. For the application, I have to consider who my market would be, what I would want to sell and what my vision is for the business.

I have dreams that one day there would be a Becky BakesWell shop. What would you want from a cake shop? Would you want to buy sandwiches and drinks? Would it be the sort of place you'd want to grab a sandwich and cake to-go or would it be the sort of place to sit at a table and linger over a magazine with a cup of coffee and a slice of cake? Would quirky milkshakes and cookies hit the spot?

I'd love a cake shop to be the sort of place that people go to, to meet up. Maybe where you can go to do crafts along with tea and cake - maybe a craft session hosted by someone else, but the place to go to hang out and be creative without making a mess in your own living room?

Why not drop me a post about your dream cake shop and what it would be like?

Thanks for popping by and reading!

Becky Bakeswell x

Sunday, 15 April 2012

Herman the German Friendship Cake


I have been given a 'Herman the German' cake and have been excited at the prospect of looking after him and baking him. I have been curious about these sorts of cakes since I read about them in a newspaper article last year, but hadn't known anyone who had been given a portion of the start-up batter. The cakes really are no trouble to look after - you basically stir them once a day and then on day 4 add a cup each of milk, flour and sugar and stir around. You stir him once a day again for the next few days and then feed him the same amounts of ingredients as day 4, then divide him up into 4 equal portions. You give three of these portions away and keep the 4th portion for yourself to bake.

A Herman cake tastes like a combination of apple crumble/Strudel filling and Stollen. I have been so impressed with the cake that I have kept a second portion of start-up batter so that I can bake another Herman cake. On the next cake, I might add some small cubes of marzipan and lemon zest. I learned this trick from a fruit cake which Nigella bakes, containing marzipan.

When I transferred him to a bigger bowl like it suggests on the instructions on day 1, I also decided to add a fresh covering of cling film and then cover with the tea towel. When I saw him the next day, he had become very bubbly and frothy.


The Instructions:

Hello, my name is Herman, I am a sour dough cake. I am supposed to sit on your worktop for 10 days without a lid on. You MUST NOT put me in the fridge or you will kill me! If I stop bubbling, I am dead.

Day 1: Take Herman and put him in a large bowl and cover loosely with a tea towel. (I just had a clingfilm cover on the bowl and then tented the tea towel over this).

Day 2: Stir well.

Day 3: Stir well.

Day 4: Herman is hungry! Add 1 cup each of milk, plain white flour and sugar. Stir well.

Day 5: Stir well.

Day 6: Stir well.

Day 7: Stir well.

Day 8: Stir well.

Day 9: Herman's hungry again! Add the same quantities of ingredients as day 4 and then divide Herman up into  4 equal portions. Give 3 portions away to friends and keep the fourth portion for yourself. Pass on a copy of these instructions with Herman.


Day 10: Herman is hungry and ready to be baked! Stir well and add:

1 cup of sugar,
half tsp salt.
2 cups of plain flour,
2 heaped tsp baking powder,
2/3 of a cup of cooking oil,
2 eggs,
2 tsp vanilla
2 heaped tsp vanilla essence,
2 cooking apples cut into small chunks,
1 cup raisins

Preheat the oven to 180 C/ 350 F/ Gas Mark 4. Mix everything together and place in a large greased baking tin (I lined the base of my tin too with baking paper). Sprinkle the top of the cake with 1/4 of a cup of brown sugar and 1/4 of a cup of melted butter.


Bake for 45 mins ( my Herman took slightly longer at 55-60 mins). I tented him with foil from 45 mins into the cooking time.

Herman is ready when a knife inserted into him comes out nearly clean - you might get some slightly sticky crumbs on the blade. He is meant to be a slightly damp cake due to the apples, but the knife blade should not contain trails of uncooked batter.

Happy baking and eating!

Becky Bakeswell x


Friday, 13 April 2012

Apple Crumble


In my life, apple crumble will forever be linked to my Mum, as she used to make it on drizzly Sundays for pudding after Sunday dinner. I grew up in a village which is now a bit rough around the edges, but in the 80s it was still on the quiet side. It was the sort of place where harassed mums would stock up on enough Christmas supplies to last a nuclear winter as the little shops on the main road shut on Christmas Eve and didn't open again until after New Year's Day.

Sundays were a scaled down version of this as nowhere was open and there was never anything to do. Sunny Sundays were spent playing kirby on the front with the other kids from the street, or climbing over our back garden fence on to the playground of the local primary school. I usually scaled the fence in my roller-boots, much to the annoyance of my Mum, who was sick of warning me about the danger of this.

Grey, rainy Sundays were usually spent playing with Barbies and dressing up whilst my Mum attempted to fit a week's worth of housework into one day. Once she was finished, we always had our Sunday disco (where we would dance around the living room to whatever music my mum was doing the housework to) and then we would sometimes bake something for pudding. Our kitchen floor was clad in 1980s white lino which for an eight year old girl equalled a perfect roller-booting surface... After much pestering my mum would cave in and let me wear my roller-boots whilst baking. I would whizz from one cupboard to another, gathering the ingredients and weighing them.

My favourite thing to make with my mum was apple crumble as I loved the smell of the cinnamon and apples cooking together. My mum always made the apple filling, as it involved boiling water, but I was allowed to make the crumble mix. The crumble mix recipe came from a big doorstop of a cookbook called 'The 1000 Recipe Cookbook'. Not long after I left home, I came across a copy of the book in a charity shop and bought it so that I would have a copy for my own kitchen.


My mum didn't make the apple filling the way it tells you to in the book though. She had her own way of doing it, which I think is nicer. I've shared the recipe with you below so that you can make it too if you like. I added some blackberries to my apple filling last weekend, just for a change, so feel free to play around with the fruit you use. Peaches or brambles picked from the hedgerows are good early Autumn alternatives.

Crumble Mix
I tend to make the crumble mix first, then as soon as the apple filling is ready, you're good to go. Your butter should be ffffffflipping cold to ensure it rubs into the flour well without becoming greasy and claggy. I always add a cheeky shake of cinnamon in with the flour as I love it. You don't want to add too much - a very gentle shake.

150g/5oz plain flour
75g/3oz sugar (I like golden granulated)
75g/3oz butter
pinch of cinnamon (optional)

Tip the flour and sugar into the bowl and stir around to combine. Cut the butter into chunks then add to your baking bowl.


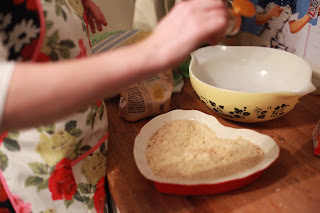
Rub the butter into the sugary-flour mixture using the tips of your fingers and thumbs in a fluttering motion. You are aiming to create a mixture which resembles rubbly breadcrumbs. It should have some fine sandy bits and then some more rubbly bits - these crisp up in the oven to make little crunchy, biscuity pebbles.


Once your crumble mix is ready, preheat the oven to 180C/ 350F or Gas mark 4 


Apple Filling 


4 large cooking apples, such as Bramley,
Sugar to taste,
Pinch of cinnamon

1) Peel and and carefully core the apples, making sure that you completely remove any of the rough apple core.


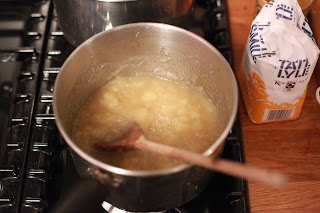
2) Chop the apples into rough chunks and put into a deep saucepan. Pour boiling water into the pan so that it just covers the fruit by about a centimetre. Bring up to a brief boil, but keep an eye on the apples, as they can soften too much. You want the apples to soften to the point where once they have been drained, they will break easily into a rough puree. You can always take a chunk out with a slotted spoon and check it.

3) Drain the apples in a colander, allowing most of the water to flow away, but leave a little left in the pan to help make a sauce. Return the apples to the pan.

4) Stir around to break up slightly and to combine with the water. You want a puree consistency with some random chunks. Sprinkle in a small pinch of cinnamon and add a couple of spoonfuls of sugar to taste. Don't add too much sugar though, as you do want a slightly sharp edge, as there's sugar in the crumble mix.


5) Pour the apple mix into your oven-proof baking dish. At this point, if you want to add blackberries, you can. I wouldn't add them before this point as they still have to go into the oven.  The heat from the oven alone will allow them to bleed and burst, dappling the pale jade mush with purplish-pink.


6) Sprinkle over the crumble mix. Depending on the size of the dish, you might end up with some left over. Don't be tempted add this if you already have a decent covering (you can freeze crumble mix in sandwich bags for next time though, so don't throw it away).You want a rubble covering that is deep enough to blanket the fruit generously, but not so deep that it will be difficult to crisp up. Sprinkle over a shake of cinnamon and sugar for good luck!


7) Bake on the centre shelf of your oven for 25-35 mins. I always put a baking tray on the shelf below to  catch any drips from the fruit which will bubble over the edges. I would check from 25 mins onwards. You want your crumble topping to be golden and crunchy on top, and for the fruity filling to have bubbled up over the edges of the dish. 


Serve with chilled pouring cream or vanilla ice cream.


The scent of apple, biscuit and cinnamon wafting out of the oven is the most comforting smell I know and always used to sweeten the Sunday night blues I used to get when I realised the weekend was over, and there was still homework lurking in the bottom of my bag somewhere...