Sunday, 15 April 2012

Herman the German Friendship Cake


I have been given a 'Herman the German' cake and have been excited at the prospect of looking after him and baking him. I have been curious about these sorts of cakes since I read about them in a newspaper article last year, but hadn't known anyone who had been given a portion of the start-up batter. The cakes really are no trouble to look after - you basically stir them once a day and then on day 4 add a cup each of milk, flour and sugar and stir around. You stir him once a day again for the next few days and then feed him the same amounts of ingredients as day 4, then divide him up into 4 equal portions. You give three of these portions away and keep the 4th portion for yourself to bake.

A Herman cake tastes like a combination of apple crumble/Strudel filling and Stollen. I have been so impressed with the cake that I have kept a second portion of start-up batter so that I can bake another Herman cake. On the next cake, I might add some small cubes of marzipan and lemon zest. I learned this trick from a fruit cake which Nigella bakes, containing marzipan.

When I transferred him to a bigger bowl like it suggests on the instructions on day 1, I also decided to add a fresh covering of cling film and then cover with the tea towel. When I saw him the next day, he had become very bubbly and frothy.


The Instructions:

Hello, my name is Herman, I am a sour dough cake. I am supposed to sit on your worktop for 10 days without a lid on. You MUST NOT put me in the fridge or you will kill me! If I stop bubbling, I am dead.

Day 1: Take Herman and put him in a large bowl and cover loosely with a tea towel. (I just had a clingfilm cover on the bowl and then tented the tea towel over this).

Day 2: Stir well.

Day 3: Stir well.

Day 4: Herman is hungry! Add 1 cup each of milk, plain white flour and sugar. Stir well.

Day 5: Stir well.

Day 6: Stir well.

Day 7: Stir well.

Day 8: Stir well.

Day 9: Herman's hungry again! Add the same quantities of ingredients as day 4 and then divide Herman up into  4 equal portions. Give 3 portions away to friends and keep the fourth portion for yourself. Pass on a copy of these instructions with Herman.


Day 10: Herman is hungry and ready to be baked! Stir well and add:

1 cup of sugar,
half tsp salt.
2 cups of plain flour,
2 heaped tsp baking powder,
2/3 of a cup of cooking oil,
2 eggs,
2 tsp vanilla
2 heaped tsp vanilla essence,
2 cooking apples cut into small chunks,
1 cup raisins

Preheat the oven to 180 C/ 350 F/ Gas Mark 4. Mix everything together and place in a large greased baking tin (I lined the base of my tin too with baking paper). Sprinkle the top of the cake with 1/4 of a cup of brown sugar and 1/4 of a cup of melted butter.


Bake for 45 mins ( my Herman took slightly longer at 55-60 mins). I tented him with foil from 45 mins into the cooking time.

Herman is ready when a knife inserted into him comes out nearly clean - you might get some slightly sticky crumbs on the blade. He is meant to be a slightly damp cake due to the apples, but the knife blade should not contain trails of uncooked batter.

Happy baking and eating!

Becky Bakeswell x


Friday, 13 April 2012

Apple Crumble


In my life, apple crumble will forever be linked to my Mum, as she used to make it on drizzly Sundays for pudding after Sunday dinner. I grew up in a village which is now a bit rough around the edges, but in the 80s it was still on the quiet side. It was the sort of place where harassed mums would stock up on enough Christmas supplies to last a nuclear winter as the little shops on the main road shut on Christmas Eve and didn't open again until after New Year's Day.

Sundays were a scaled down version of this as nowhere was open and there was never anything to do. Sunny Sundays were spent playing kirby on the front with the other kids from the street, or climbing over our back garden fence on to the playground of the local primary school. I usually scaled the fence in my roller-boots, much to the annoyance of my Mum, who was sick of warning me about the danger of this.

Grey, rainy Sundays were usually spent playing with Barbies and dressing up whilst my Mum attempted to fit a week's worth of housework into one day. Once she was finished, we always had our Sunday disco (where we would dance around the living room to whatever music my mum was doing the housework to) and then we would sometimes bake something for pudding. Our kitchen floor was clad in 1980s white lino which for an eight year old girl equalled a perfect roller-booting surface... After much pestering my mum would cave in and let me wear my roller-boots whilst baking. I would whizz from one cupboard to another, gathering the ingredients and weighing them.

My favourite thing to make with my mum was apple crumble as I loved the smell of the cinnamon and apples cooking together. My mum always made the apple filling, as it involved boiling water, but I was allowed to make the crumble mix. The crumble mix recipe came from a big doorstop of a cookbook called 'The 1000 Recipe Cookbook'. Not long after I left home, I came across a copy of the book in a charity shop and bought it so that I would have a copy for my own kitchen.


My mum didn't make the apple filling the way it tells you to in the book though. She had her own way of doing it, which I think is nicer. I've shared the recipe with you below so that you can make it too if you like. I added some blackberries to my apple filling last weekend, just for a change, so feel free to play around with the fruit you use. Peaches or brambles picked from the hedgerows are good early Autumn alternatives.

Crumble Mix
I tend to make the crumble mix first, then as soon as the apple filling is ready, you're good to go. Your butter should be ffffffflipping cold to ensure it rubs into the flour well without becoming greasy and claggy. I always add a cheeky shake of cinnamon in with the flour as I love it. You don't want to add too much - a very gentle shake.

150g/5oz plain flour
75g/3oz sugar (I like golden granulated)
75g/3oz butter
pinch of cinnamon (optional)

Tip the flour and sugar into the bowl and stir around to combine. Cut the butter into chunks then add to your baking bowl.


Rub the butter into the sugary-flour mixture using the tips of your fingers and thumbs in a fluttering motion. You are aiming to create a mixture which resembles rubbly breadcrumbs. It should have some fine sandy bits and then some more rubbly bits - these crisp up in the oven to make little crunchy, biscuity pebbles.


Once your crumble mix is ready, preheat the oven to 180C/ 350F or Gas mark 4 


Apple Filling 


4 large cooking apples, such as Bramley,
Sugar to taste,
Pinch of cinnamon

1) Peel and and carefully core the apples, making sure that you completely remove any of the rough apple core.


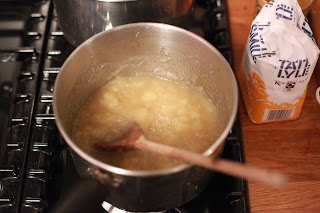
2) Chop the apples into rough chunks and put into a deep saucepan. Pour boiling water into the pan so that it just covers the fruit by about a centimetre. Bring up to a brief boil, but keep an eye on the apples, as they can soften too much. You want the apples to soften to the point where once they have been drained, they will break easily into a rough puree. You can always take a chunk out with a slotted spoon and check it.

3) Drain the apples in a colander, allowing most of the water to flow away, but leave a little left in the pan to help make a sauce. Return the apples to the pan.

4) Stir around to break up slightly and to combine with the water. You want a puree consistency with some random chunks. Sprinkle in a small pinch of cinnamon and add a couple of spoonfuls of sugar to taste. Don't add too much sugar though, as you do want a slightly sharp edge, as there's sugar in the crumble mix.


5) Pour the apple mix into your oven-proof baking dish. At this point, if you want to add blackberries, you can. I wouldn't add them before this point as they still have to go into the oven.  The heat from the oven alone will allow them to bleed and burst, dappling the pale jade mush with purplish-pink.


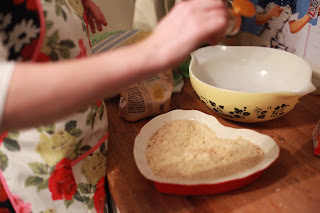
6) Sprinkle over the crumble mix. Depending on the size of the dish, you might end up with some left over. Don't be tempted add this if you already have a decent covering (you can freeze crumble mix in sandwich bags for next time though, so don't throw it away).You want a rubble covering that is deep enough to blanket the fruit generously, but not so deep that it will be difficult to crisp up. Sprinkle over a shake of cinnamon and sugar for good luck!


7) Bake on the centre shelf of your oven for 25-35 mins. I always put a baking tray on the shelf below to  catch any drips from the fruit which will bubble over the edges. I would check from 25 mins onwards. You want your crumble topping to be golden and crunchy on top, and for the fruity filling to have bubbled up over the edges of the dish. 


Serve with chilled pouring cream or vanilla ice cream.


The scent of apple, biscuit and cinnamon wafting out of the oven is the most comforting smell I know and always used to sweeten the Sunday night blues I used to get when I realised the weekend was over, and there was still homework lurking in the bottom of my bag somewhere...

Monday, 9 April 2012

Easter Weekend Baking Frenzy!

I have been in a bit of a baking frenzy this weekend - I've been baking lots of cupcakes and a gluten free chocolate cake for a friend's baby naming ceremony. I have also been given a portion of starter batter for a 'Herman the German' Friendship cake, which I have been feeding in preparation for his trip to the oven later in the week and I have baked an apple crumble for pudding today.

Will post separately about Herman and the Apple Crumble, but thought I'd give you a sneak peak at a bit of the baking action that BakesWell HQ has seen over the last few days...


The cupcakes were vanilla and chocolate, with handmade daisy and butterfly decorations. Our friend's lovely baby is called Callie, so I decided to spell out her name in honour of the occasion. Other special requests came in the form of diabetic friendly cupcakes (below) and a diva of a gluten-free chocolate cake. I find Xylitol works well to create a sugar free chocolate meringue buttercream which is mousse-like in texture and far lighter than standard buttercream.


The gluten-free chocolate cake is a combination of two recipes from Nigella Lawson and Sophie Dahl, which made Audrey, (the lovely lady who received the cake), one happy gal indeed! 


Just about to tuck in to the apple crumble, so will post later about the rest of my baking adventure...

Until then,
Happy Baking!
Becky Bakeswell x
Wednesday, 4 April 2012

Hello Kitty confetti cake

I could hardly contain my excitement at my recent find - confetti cakes. Imagine a beautiful vanilla cake flecked with the colours of the rainbow. Combine this with the epitome of cake shaped cuteness - Hello Kitty, and you have one helluva birthday cake - well my friend Becky did this week.


All you have to do to grab yourself a piece of the confetti cake action is fold some hundreds and thousands into the cake mix, just before you dollop the mix into the cake tins. 


When the cake is baked and sliced open, it looks like this:


I love the fact that nobody slices into a cake expecting it to be decorated inside too. It's for this reason that I like to keep the external decoration simple so that the confetti interior is a nice surprise. 


Thursday, 29 March 2012

We are the music makers and we are the dreamers of dreams...

I have decided to enter a competition in a homes magazine to launch Becky BakesWell as a proper business. I feel like Charlie Bucket when he nervously asks Grandpa Jo if he stands a chance of finding a golden ticket in his birthday Wonka bar. Grandpa Joe replies 'You've got more chance Charlie, because you want it more.'

I don't think that wishing and hoping is going to give me any more of a chance, but Grandpa Joe's sentiment does make me think that somebody has to win the competition and I do stand a chance, however slim.

I've got to fill in an application form with all sorts of Apprentice-style questions - eek! I need to market Becky BakesWell but I don't want to sound like Stuart 'the brand' Baggs from last year's series of the show, haha!

Will update you on my progress soon. This weekend I will be baking something special as a surprise.. more on that on Monday or Tuesday.

Until then I thought I'd leave you with the moment that my baking fate was sealed...

Pure Imagination

Happy Baking!

Becky BakesWell x

Wednesday, 28 March 2012

Pete's Perfect Flapjacks

Flapjacks were one of the first things that I baked for Dan - this came about as a result of Dan reminiscing about some flapjacks that his Scottish mate had made years back and a random conversation where Dan tried to get the recipe so that we could make them. This is a copy of the recipe that I hastily scribbled down as the ingredients and method were relayed over the phone by Dan's mate Pete.

It is for this reason that I named them Pete's Perfect Flapjacks, and be warned - these are not the sort of dusty, dessicated flapjacks that you'd find in a health food shop. Instead, they are oaty, chewy oblongs blessed with a resiny depth from the golden syrup. Not good if you're on a diet, but bugger it I say! 

As a guide, you set the amount of oats you will use then half the amount of butter and sugar.

I decided to use a small roasting tin as my flapjack tin. I just tipped the dry oats into the tin until they came about half-way up the sides. I used my hand to roughly level the oats in the tin and  then tipped the oats into the bowl of the scales to give me my set amount - 400g oats.


400g rolled oats
200g butter
200g soft brown sugar
3 tablespoons of golden syrup
optional extra - sprinkle of cinnamon

1) Preheat your oven to 180 degrees centigrade/ 350 degrees farenheit or gas mark 4.
2) Grease and line a small but deep, square tin with baking paper.
3) Melt butter and sugar in pan over a gentle heat.
4) Add the oats and mix thoroughly to coat the oats so that they are slick and glossy.
5) Swirl the golden syrup into the pan along with a sprinkle of cinnamon for a subtle earthy flavour.
6) Stir the mixture to combine and then tip into the prepared tin.
7) Smooth the mixture to create an even layer, with the back of a wooden spoon, then transfer to the centre shelf of the oven for 10-15 mins.

Keep a close eye on the flapjacks in the oven as they are prone to catching and become brittle when left without attention. The flapjacks are ready when the edges are a deep golden brown but the centre just has a pale golden glow from the oven. Slice into squares whilst warm but leave to cool completely before taking out of tin, as the mix is still pliable when warm and is prone to breakages. 


Tuesday, 27 March 2012

Cookie Love


I am rather excited that I will have some time over Easter to experiment with these babies from NY. I went to New York at Christmas for a very special holiday and as Dan and I were striding through the streets on Christmas Eve near Park Avenue,  I squealed with excitement when I saw a Williams Sonoma store - I know,  I know - squealing should be reserved for the shop with the little blue boxes... not a kitchenware shop eh? Sorry to disappoint, but that's the kinda geeky gal I am! Rather than trying to desperately fit clothes or gadgets into my suitcase as mementos of my stay in the Big Apple, I was dreaming up schemes to bring my baking booty back to Blighty!

I had seen these cookie cutters on the WS website about a year before my trip and was crestfallen to find that the site only sent international deliveries out to certain countries and the UK was not on the list. So to find these cutters in the Park Avenue area store made the wait worthwhile. I have been on the WS site recently though and it seems that they have now added UK to their list of global deliveries. Not before time too!

I think I'll need to experiment with a few cookie recipes beforehand to get a good balance between a fine crumb texture to make sure that lettering is clear on the cooked cookies and to make sure that the finished cookies taste good. All too often, cookies are a case of style over substance, resembling mini works of art rather than the tasty treats that they deserve to be.

Thursday, 8 March 2012

Easter Cake - Update

 The Easter cake is very nearly finished. All I need to do is add a piece of co-ordinating ribbon to the edge of the cake board and we are done!

 Looking at the cake as a finished piece, I have a soft-spot for the marzipan duck and chicks - they make me cheerful when I see them guarding the fake cake (the cake is a dummy cake for my assessment). There are some imperfections that do niggle me a bit - I can't help it, it's the perfectionist diva in me. However, I know what I would need to do to put these things right to improve the finish for future cakes, which I guess is the important thing.

In more news, we take delivery of our new oven on Saturday! I feel a bit of a traitor to the sisterhood doing a  little kitchen dance at this exciting news especially as it's International Women's Day and I'm cooing over pictures of the oven like a proud parent! However, like a baby, this oven is long over-due and presents a new chapter in my life as Becky BakesWell. Living without an oven for seven months has been torturous - no homemade roasties in all this time (cue sniffling and sob). My family have been kind enough to let me use their ovens to bake cakes for friends, and without them, my mission to start delivering cake happiness would have been impossible indeed!

This weekend, roasties and cake baking are on my agenda - will post more recipes and cake related adventures soon!

Happy Baking,
Becky B x

Thursday, 1 March 2012

Easter Cake Project

Hey there!
For readers that don't know me, I travel quite a distance to work from where I live and in Winter, my morning commute to Yorkshire across the Pennines in the fog and murky light can be grim. However, with the light mornings and warmer weather here, it's nice to see the landscape changing along with the seasons. This morning I noticed that the snowdrops are also shooting up in the gardens that I pass - a sure fire sign that Spring is on its way and Easter is around the corner. So, with this in mind, I thought I'd add a post about my Easter cake project. I have been inspired by Peggy Porschen's simple and kitsch duck motif cake below.


I started off with a plain white sugar paste covered dummy cake as the basis of the design, which I have then embossed with butterflies and a flower design which looks a bit like Broderie Anglaise. I also added a crimped border around the top edge of the cake, in the shape of bows. 

The second stage of the design consisted of painting the embossed decorations with powdered pigments. It's best to use vodka as the liquid to mix with the powders as this dries much quicker than water and therefore is less likely to bleed. 

I've also modelled a duck and chicks out of marzipan which I have tinted yellow, adding beaks from orange tinted marzipan. These models will sit on top of the cake, inside the circle of flowers. To unify the different aspects of the design, I've started to make a border for the bottom of the cake out of balls of pink and yellow sugarpaste, in a graduated design, which will pull the colours together. 

Here are the pics of the work in progress:


Can't wait to finish the decoration and post the finished results!

Until then,
Happy Baking x


Sunday, 19 February 2012

Becky BakesWell Promo

Royal Icing Celebration Cake - Update


In my last post about this assessment cake, I said I would post some photos of the work in progress, so here they are! The cake still needs its finishing touches, but the piped 'S' and 'C' scroll boarders are now in place. These borders are quite difficult to pipe in a consistent way, ensuring that the size of each scroll is uniform around the cake and that the borders meet up in a neat way.

Saturday, 4 February 2012

Spring Makeover

Despite the festive snow and cold weather, I felt it was time for the BakesWell blog to have a bit of a makeover, ready for the spring! I've had a busy week baking a birthday cake in the shape of a leopard for a friend's daughter. I have also progressed on to the next stage of decoration for my assessment cake on my cake decoration course. More photos to follow on that...

More good news also comes in the form of the oven we have finally ordered! I have been baking at my mum's as my lovely range has been broken since the summer, but I have found it difficult to choose a replacement. We have (after looking at every major oven company that produces ranges) decided to go for the Rangemaster Elan in Latte. http://www.rangemaster.co.uk/range-cooking/elan-90

I'm so excited that I will be able to bake cakes in my kitchen again and I'm looking forward to roast potatoes again on Sundays - yum!

Happy baking!
Becky x

Wednesday, 18 January 2012

Royal Icing Celebration Cake

Hope you had a great Christmas and a happy New Year! Sorry for the break between posts - I had a particularly special Christmas as my lovely boyfriend proposed whilst we were in New York, so I have had a busy but exciting few weeks looking at wedding venues!

So, back to cake related talk! I am in the initial stages of decorating my assessment piece for a a cake decoration course that I am taking. I am pleased with how it's going and thought I'd post some photos.


I have flat iced the cake with a few thin layers of royal icing and then I piped a central border using a number three nozzle in white. I then over-piped this with a number two nozzle in white and then the final layer of over-piping was done in the finest nozzle - number 1. This top layer of over-piping was tinted cerise. Once the central border was dry, I decided to use some icing flowers that I had made a few weeks previously and arranged them inside the border, along with a piped greeting in pink for my mum.

Covering the board was fun but quite messy! I diluted the royal icing with Renwhite to make the icing for the board more resilient, so that it can withstand minor knocks. I would say that the consistency would be the same used for icing run-outs - about the same consistency as unwhipped double cream.

The final stages of decoration will be piping a rope border along the top edge and then a scroll border around the bottom edge. I'll also decorate the sides of the cake with the remaining icing flowers that I have. This dummy cake has taken quite a while to complete but I'm happy with it so far!

Will post pictures of the finished cake next week.
Becky Bakeswell x